
How the Fluid Tank Works
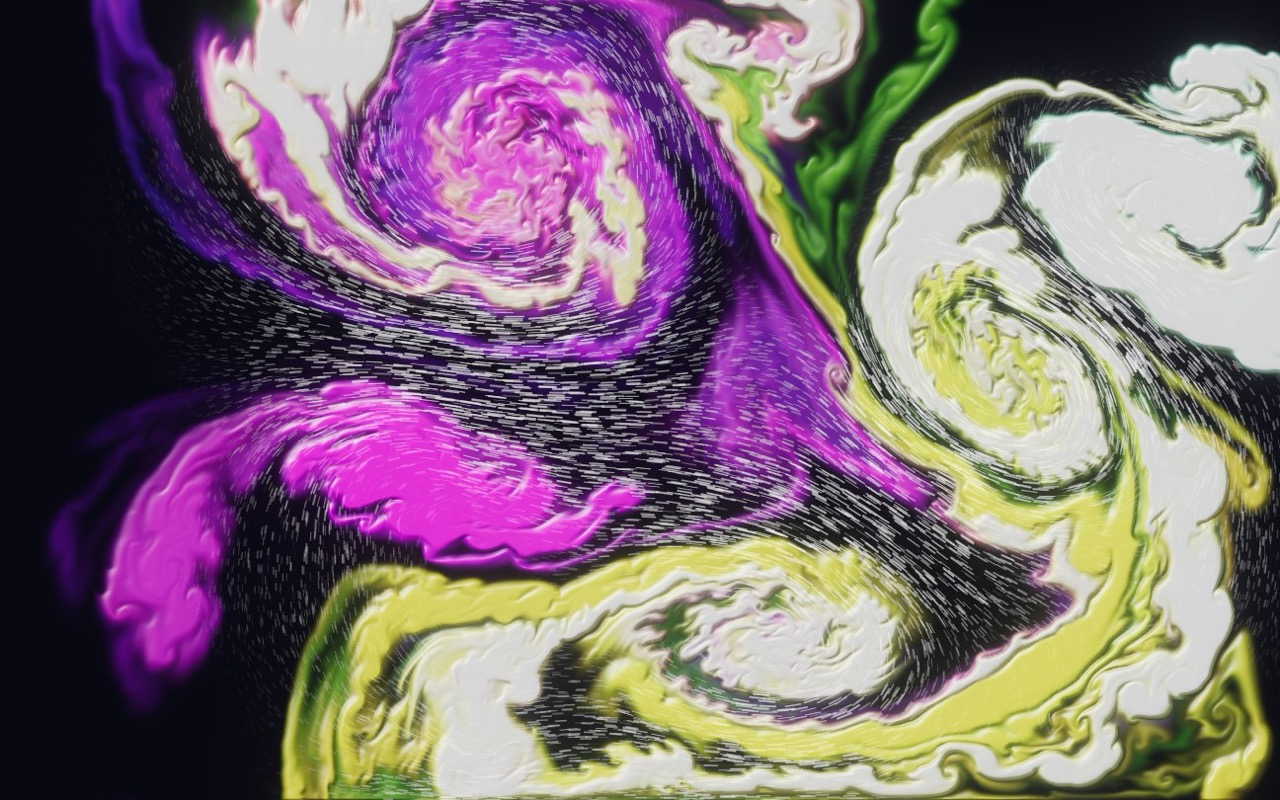
The Fluid Tank is a store package: a tank of water you stir with the mouse, simulated on the GPU every fixed step. This page takes it apart step by step, so you can tune it, add walls and pushers of your own, or build a fluid like it from scratch.
What you will learn
- The method: stable fluids, as a list of GPU passes over render textures.
- What each object, render texture and simulation step in the tank does, with its numbers.
- How a mouse drag becomes a push and a trail of colour.
- How the water and the sparks are drawn, and which settings change them.
- How to add walls, pushers, colour and drains of your own.
Before you start
- Get Fluid Tank from the Asset Store. When the editor offers its sample, choose Open scene (it is also in Assets > Scenes as Fluid Tank Sample).
- Press Play and drag across the water.
- Open File ▸ Project Settings… and, under Render layers, name layers 1 to 4 Obstacles, Forces, Sources and Dye. The package uses those four layers, but it does not bring their names, and the layer pickers list an unnamed layer only where it is already ticked.
The pages this one builds on: Simulations (update graphs and the Simulation asset) and Render Textures (textures cameras draw into, and render layers).
The method
The tank uses stable fluids (Jos Stam, 1999), the grid method most real-time smoke and ink effects are built on. The water is a grid of cells, and each cell holds a velocity. Every fixed step:
- Advect: move the velocity along itself. Each cell looks back along its own velocity and takes the value it finds there.
- Add forces: your strokes push the water, and vorticity confinement puts back the small eddies the grid's averaging smooths away.
- Project: make the flow incompressible. Water cannot pile up in one cell or thin out in another, so the solver finds a pressure field whose slope, taken off the velocity, leaves every cell with as much flowing in as out.
- Carry what floats: move the colour (dye) and the sparks along the new velocity.
Each of these is one or more full-screen passes over a render texture: an update graph in the tank's simulation asset, Water (its id is fluid).
What is in the tank
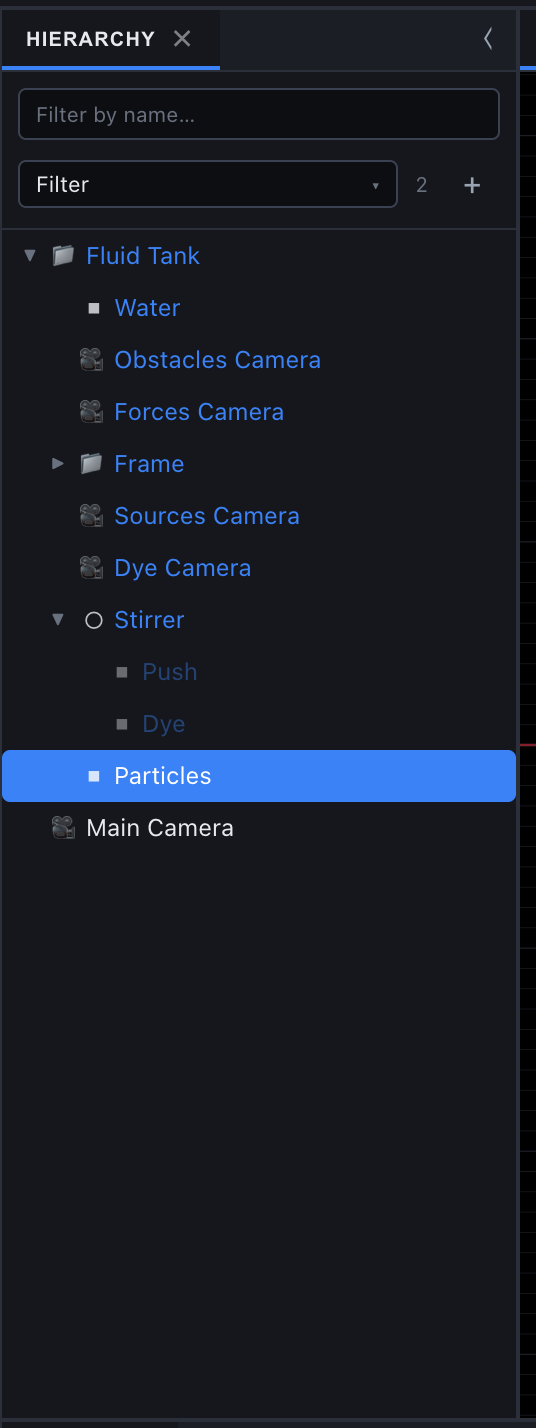
| Object | What it does |
|---|---|
| Fluid Tank | The prefab root. The water spans 1.6 x 1 of its local units, from (0, 0) to (1.6, 1). Move it and scale it uniformly; do not rotate it. |
| Water | A quad over the tank. Its Simulation component runs the Water simulation (in the Scene view too, with simulateInScene); its MeshMaterial, Fluid Display, draws the colour. |
| Obstacles / Forces / Sources / Dye Camera | Orthographic cameras (size 0.5) on the tank. Each draws one render layer into one render texture; the Simulation component binds them to its four camera slots. |
| Frame | Four thin Shape 2D bars just outside the tank's edges, on the Obstacles layer: its walls. |
| Stirrer | The Fluid Stirrer script and two brushes it lays along your drag: Push (on the Forces layer) and Dye (on the Dye layer). |
| Particles | One quad drawn up to 40,000 times, once per spark, from the fluid-particles texture. |
The sample's Main Camera sits outside the prefab: orthographic, size 0.5, centred on (0.8, 0.5), drawing only the Default layer, so the four simulation layers never reach the screen.
One fixed step
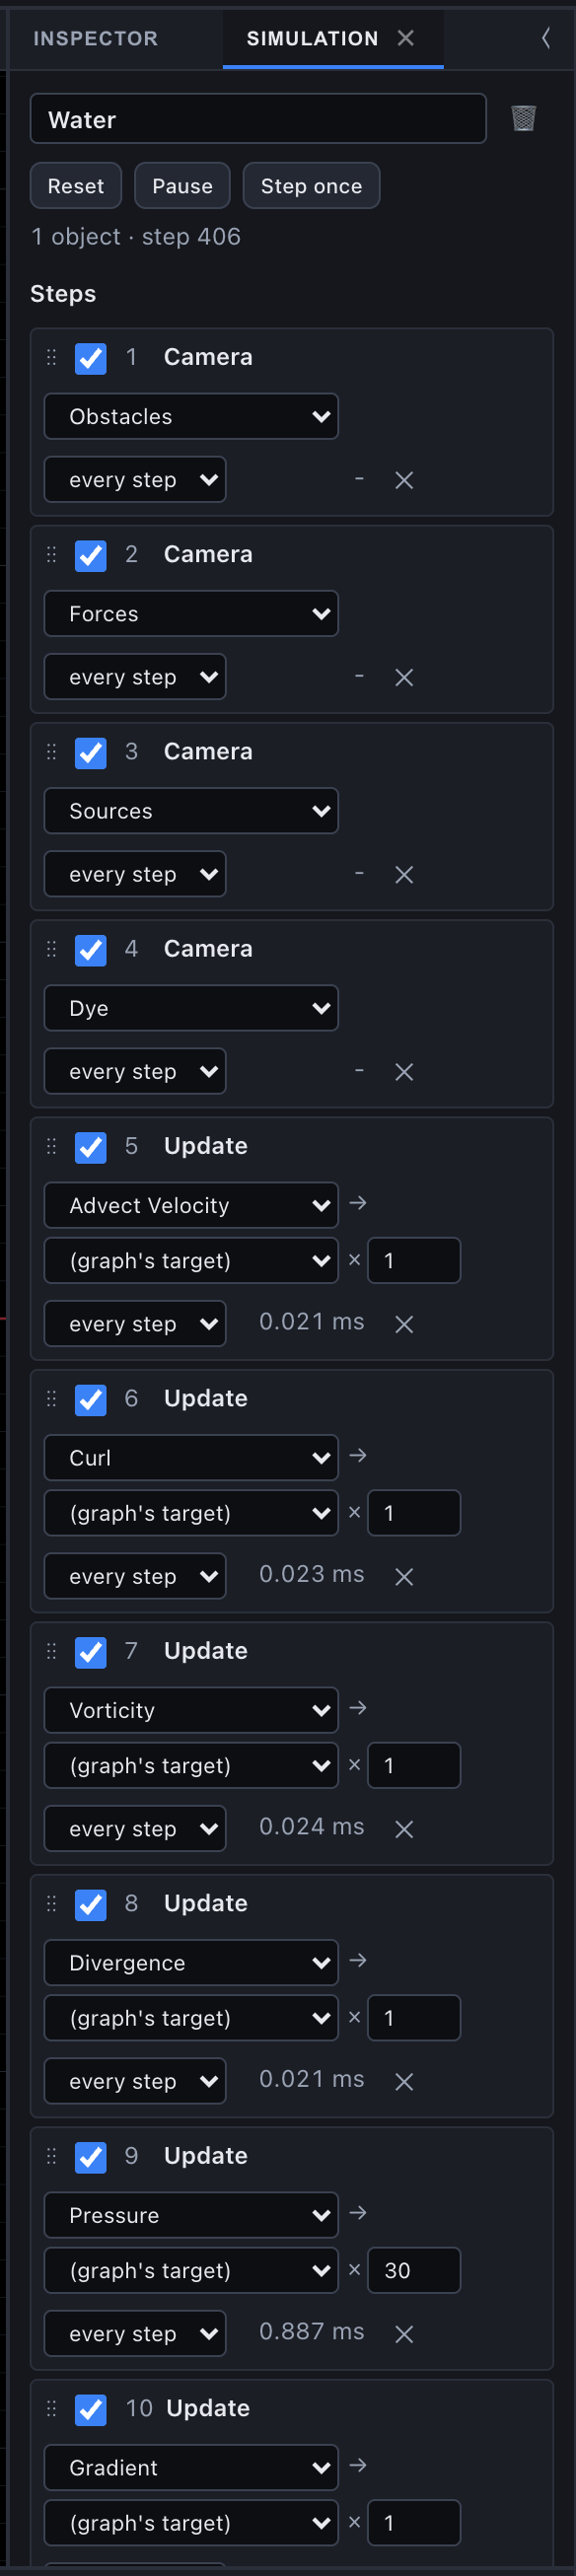
The Simulation runs once per fixed step, 60 times a second by default. Each step is 12 steps of its own, in this order:
Select Water and open Windows ▸ Simulation to see the same list, each update step with its GPU time. In the screenshot, each pass takes about 0.02 ms and the 30 Pressure passes take 0.89 ms together, so the pressure solve is most of the cost. In all, a step is 4 camera draws and 37 full-texture passes.
The render textures
| Texture | Size and format | Holds | Written by | Read by |
|---|---|---|---|---|
| fluid-velocity | 410 x 256 rg16float, double-buffered | Velocity in tank units a second (x right, y up) | Advect Velocity, Vorticity, Gradient | Most steps, Fluid Sparks |
| fluid-curl | 410 x 256 r16float | How fast the water turns at each cell | Curl | Vorticity |
| fluid-divergence | 410 x 256 r32float | How much more flows out of a cell than in | Divergence | Pressure |
| fluid-pressure | 410 x 256 r32float, double-buffered | Pressure | Pressure | Gradient |
| fluid-forces | 410 x 256 rgba16float | Pushes: xy target velocity times weight, z weight | Forces Camera | Advect Velocity, Particles |
| fluid-obstacles | 410 x 256 r16float | Signed distance to the nearest wall: negative inside a wall, 4 in open water | Obstacles Camera | Every step that respects walls |
| fluid-sources | 410 x 256 rg16float | x: water poured in (negative drains). y: how much the water is slowed | Sources Camera | Divergence (x), Advect Velocity (y) |
| fluid-dye | 1024 x 640 rgba16float, double-buffered | Colour, 0 to 12 per channel | Advect Dye | Fluid Display, Fluid Sparks |
| fluid-dye-sources | 1024 x 640 rgba16float | Colour added this step | Dye Camera | Advect Dye, Particles |
| fluid-particles | 200 x 200 rgba32float, double-buffered | One spark per texel: xy where it is (0 to 1 across and down the tank), z its age, w its lifetime in seconds | Particles | Fluid Sparks |
410 x 256 cells over 1.6 x 1 units makes square cells 1/256 of a unit across. The colour is 2.5 times finer (1024 x 640), so it keeps detail the velocity grid cannot hold.
You can watch every texture live: the Simulation panel's Textures section updates four times a second, in the Scene view and in Play. Click a thumbnail to open it in the Inspector, where you can pick a channel and a value range.
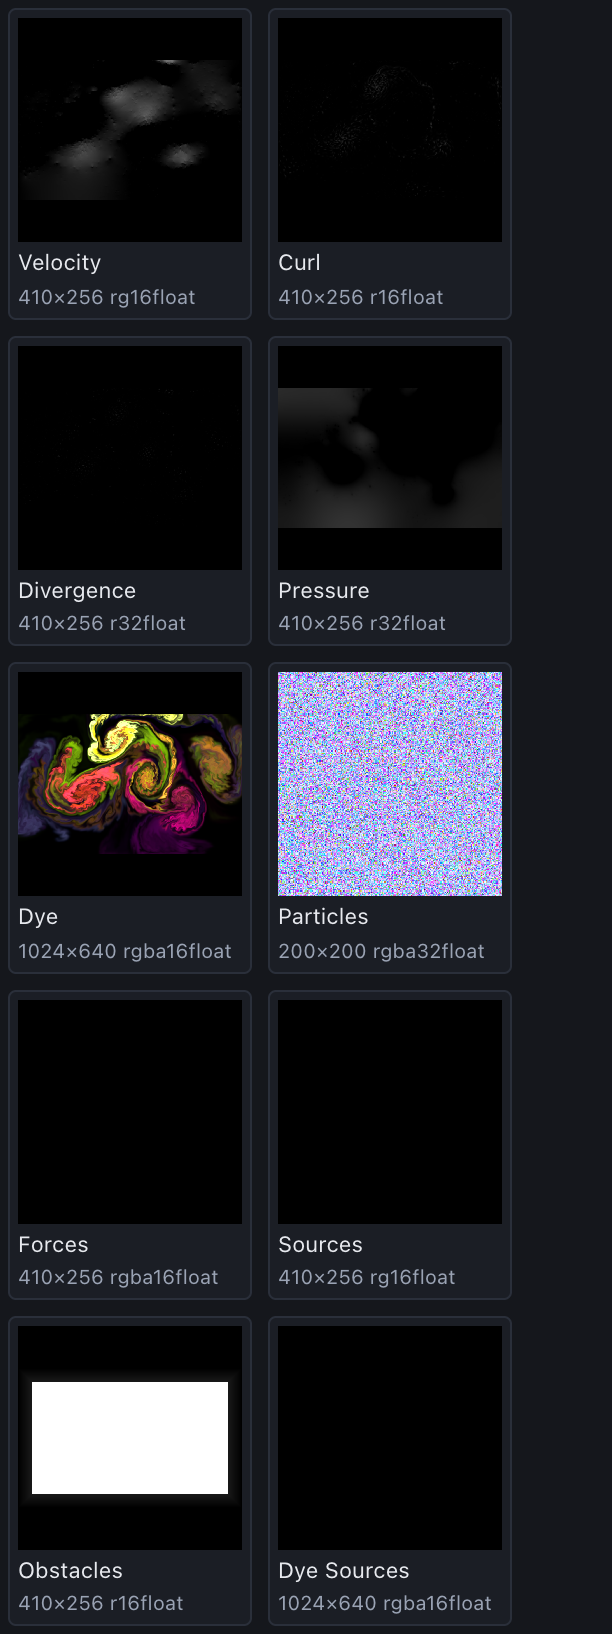
The thumbnails map 0 to black and 1 to white, so negative velocity and pressure show black. Use the Inspector's range to see them.
The steps
Every number below is a constant inside the step's update graph. Open a graph from Assets > Shaders in the Shader Graph editor to change it.
Cameras: walls, pushes, sources and colour
Every step starts with the four camera draws. Each camera clears its texture and draws only the objects on its render layer.
- Obstacles (layer 1) draws with an override material, Shape Distance: instead of its colour, every object on the layer writes its signed distance from its Shape 2D, blended with min, so the texture holds the distance to the nearest wall. It clears to 4 (open water). A cell is inside a wall where the value is below 0.
- Forces (layer 2) adds up pushes. A push brush writes (direction x speed x weight, weight); dividing by the summed weight gives the velocity the water is pushed toward.
- Sources (layer 3) holds water poured in or drained (x) and damping (y). Nothing in the package draws on it; it is there for sources and drains of your own.
- Dye (layer 4) adds up colour to pour in this step.
Advect Velocity
Each cell looks back one step (1/60 s) along its own velocity and samples the velocity there (bilinear). Then, in order:
- The velocity is multiplied by 0.9917, so the water keeps 61% of its speed after a second (0.9917 to the power 60).
- Where fluid-forces has weight
w, its target velocitytis xy divided byw. The water speeds up towardtalongt's direction and is never slowed by it:v += dir(t) * max(|t| - dot(v, dir(t)), 0) * (1 - exp(-80 w)). - The Sources texture's y slows it:
v *= exp(-y). - Speed is capped at 40 units a second.
- Inside a wall it is 0.
Curl and Vorticity
Curl writes how fast the water turns at each cell, from the difference of its neighbours' velocities. Vorticity then pushes each cell sideways, toward the stronger turning around it, with strength 10 applied over 1/60 s. This is vorticity confinement: it puts back the small eddies that sampling between cells blurs away each step. Raise 10 for curlier water; set it to 0 for smooth, syrupy flow.
Divergence
For each cell: half of (right minus left velocity) plus (top minus bottom), the net flow out of the cell. A neighbour that is inside a wall or off the grid counts as the cell's own velocity reversed, so no water crosses a wall or the grid's edge. The Sources texture's x is subtracted, scaled to the grid: water poured in is extra flow the pressure must push outward.
Pressure (x 30)
The Pressure graph runs 30 times per step (the x 30 in the Simulation panel). Each pass updates half the cells, alternating like the squares of a chessboard (red-black Gauss-Seidel): a cell's pressure becomes the average of its four neighbours minus its divergence, over-relaxed by 1.8 (successive over-relaxation, which converges in fewer passes). A neighbour inside a wall counts as the cell's own pressure, so the wall pushes back without leaking. Each step starts from the last step's pressure, so the solve carries on between steps.
More passes make the water stiffer and more truly incompressible; fewer are cheaper and make it springier. This is the one step whose cost you will notice.
Gradient
Takes the pressure's slope (half the difference of neighbours) off the velocity. Beside a wall, the part of the velocity pointing into the wall is clamped to 0, so water slides along walls. After this step, almost no cell has more flowing in than out.
Advect Dye
The same look-back as Advect Velocity, on the finer colour grid. Then:
- The colour is multiplied by 0.9868 per step, so half of it is gone after 0.87 s.
- This step's fluid-dye-sources is added.
- Each channel is capped at 12.
- Inside a wall it is 0.
Thick colour (up to 12) stays visible for several seconds after it starts to fade, because Fluid Display saturates it (see below).
Particles
Each of the 40,000 texels is one spark:
- It moves with the midpoint method: it samples the velocity where it is, again half a step ahead, and moves by the second sample.
- It is reborn when its age passes its lifetime, when it lands inside a wall, or when it has never been born. A lifetime is random, 1.5 to 6 seconds.
- Where it is reborn: 30% of rebirths pick the busiest of 8 random points, the one with the most colour being added or pushing, and add a random offset (0.012 units across), so sparks appear where you stir. The rest appear anywhere. First births start at a random age, so the sparks never expire all at once.
Stirring
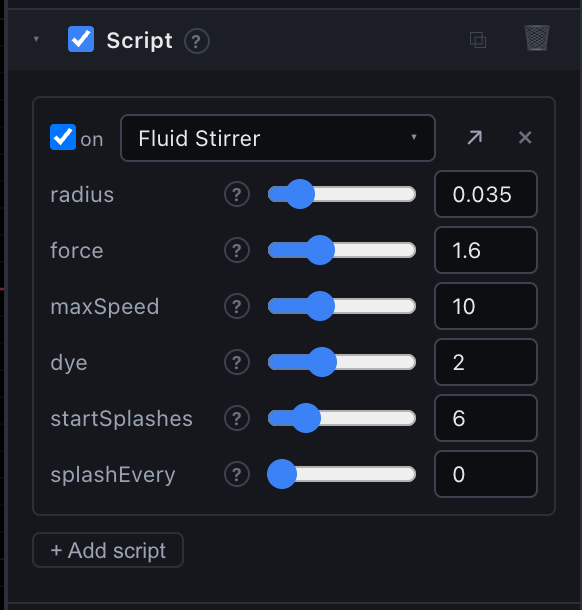
The Fluid Stirrer script runs in onFixedUpdate. In onStart it sets api.input.pointerLockEnabled = false and api.input.gestureKeysEnabled = false: the mouse stays a cursor and its clicks reach the game, and a touch is not turned into key presses. Then, every step that the primary button is held over the water, it:
- Finds the pointer on the tank's plane: a ray from the camera (
api.screenToWorld), through the Fluid Tank's position and scale, in tank units. - Lays its two brushes along the segment from last step's pointer to this one: centred on the segment, turned to its direction, and scaled to its length plus 6 radii by 6 radii.
- Sets the brushes' per-object material overrides: Length and Radius on both, Speed on Push (the stroke's speed, capped at maxSpeed, times force), and Color on Dye. The colour's hue drifts with time and with where you drag, and its strength grows with the stroke's speed, so a stroke leaves the same colour per unit length however fast you move.
The brushes' materials, Push Capsule and Dye Capsule, each draw a soft capsule along the segment, weighted exp(-d² / r²) / 60 at distance d from its core line. They skip any pixel whose straight line from the stroke's start crosses a wall (they test 11 points along it in fluid-obstacles), so a drag cannot push or paint through a wall. Dye Capsule also has a Rainbow mode, on by default, that colours by time and position; the Stirrer's Dye brush sets Rainbow to 0 so the script's Color is used.
When the button is up, the script hides both brushes, except for random splashes: startSplashes strokes (one every 8 steps) as the scene starts, then one every splashEvery seconds.
| Setting | Default | What it changes |
|---|---|---|
| radius | 0.035 | Half the stroke's width, in tank units. |
| force | 1.6 | The water is pushed toward the stroke's speed times this. |
| maxSpeed | 10 | The fastest stroke counted, in units a second. |
| dye | 2 | How much colour a stroke leaves; 0 for none. |
| startSplashes | 6 | Random splashes as the scene starts; 0 for none. |
| splashEvery | 0 | Seconds between later random splashes; 0 for none. |
What you see
The water: Fluid Display
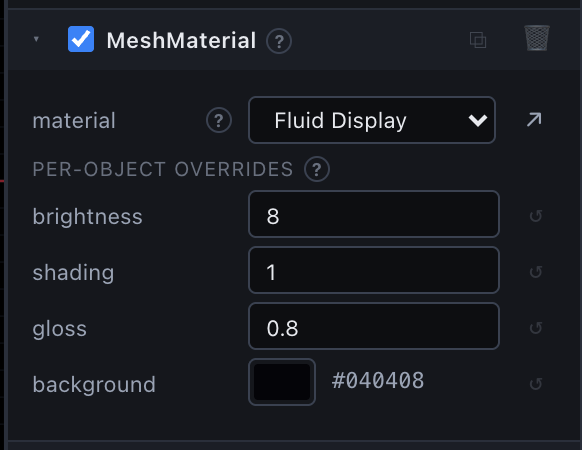
Fluid Display is an unlit hook material on the Water quad. For each pixel it:
- Reads the colour and saturates it per channel:
1 - exp(-dye * brightness). Thin colour shows faint and see-through; thick colour fills in to full strength and never clips. - Reads the same value at the four neighbouring colour texels and treats it as height. The slope gives a surface normal, lit from the top left: the lit side of a fold brightens up to 1.7 times, the shaded side darkens down to 0.3 times. shading blends from flat (0) to fully lit (1).
- Adds a highlight where the normal faces the light (specular power 40), times gloss, only where there is colour.
- Adds background, the colour of clear water.
| Setting | Default | What it changes |
|---|---|---|
| brightness | 8 | How strongly the colour shows. Higher fills a stroke with solid colour. |
| shading | 1 | 1 lights the colour as folds of ink, 0 shows it flat. |
| gloss | 0.8 | The white highlight on the folds; 0 for none. |
| background | near black | The colour of still, clear water. |
The sparks: Fluid Sparks
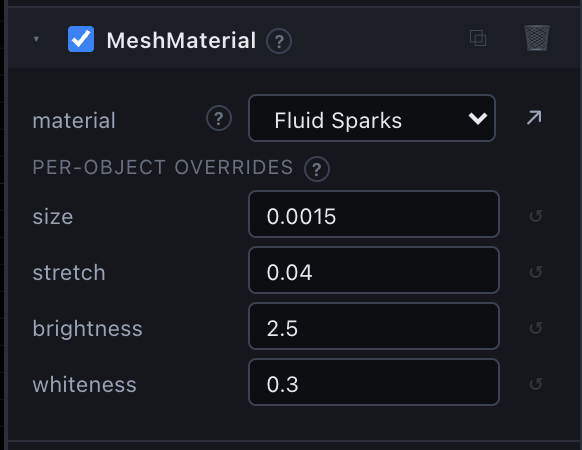
Fluid Sparks is an additive, unlit hook material on the Particles quad, which its MeshRenderer draws once per texel of fluid-particles (instanceTexture), up to instanceCount times (25,000 in the sample; 40,000 at most). Its vertex hook:
- Reads its spark with
awkInstanceTexel()and samples the velocity there. - Places the quad on the spark, through the Particles object's own transform (so a moved or scaled tank still lines up), and stretches it backwards along the velocity by speed times stretch (at most 0.12 units).
- Fades it in over the first 12% of its life and out over the last 40%, and by speed: a spark in still water is invisible, one moving 0.8 units a second or faster is at full strength.
Its fragment hook draws a soft capsule tinted with the colour of the water under it, mixed toward white by whiteness (white where the water is clear). Turn the Particles object off for water without sparks: the Particles step keeps running, but nothing draws them.
| Setting | Default | What it changes |
|---|---|---|
| size | 0.0015 | A spark's radius, in tank units (each spark varies from 0.6 to 1.4 times this). |
| stretch | 0.04 | Seconds of motion a streak shows; 0 for round dots. |
| brightness | 2.5 | How bright the sparks are. |
| whiteness | 0.3 | 0 takes the water's colour, 1 is white. |
The glow
The glow around bright colour is the sample scene's Bloom (intensity 0.7, threshold 0.8), set with the rest of its render settings. See Post-processing.
Make it your own
Add a wall
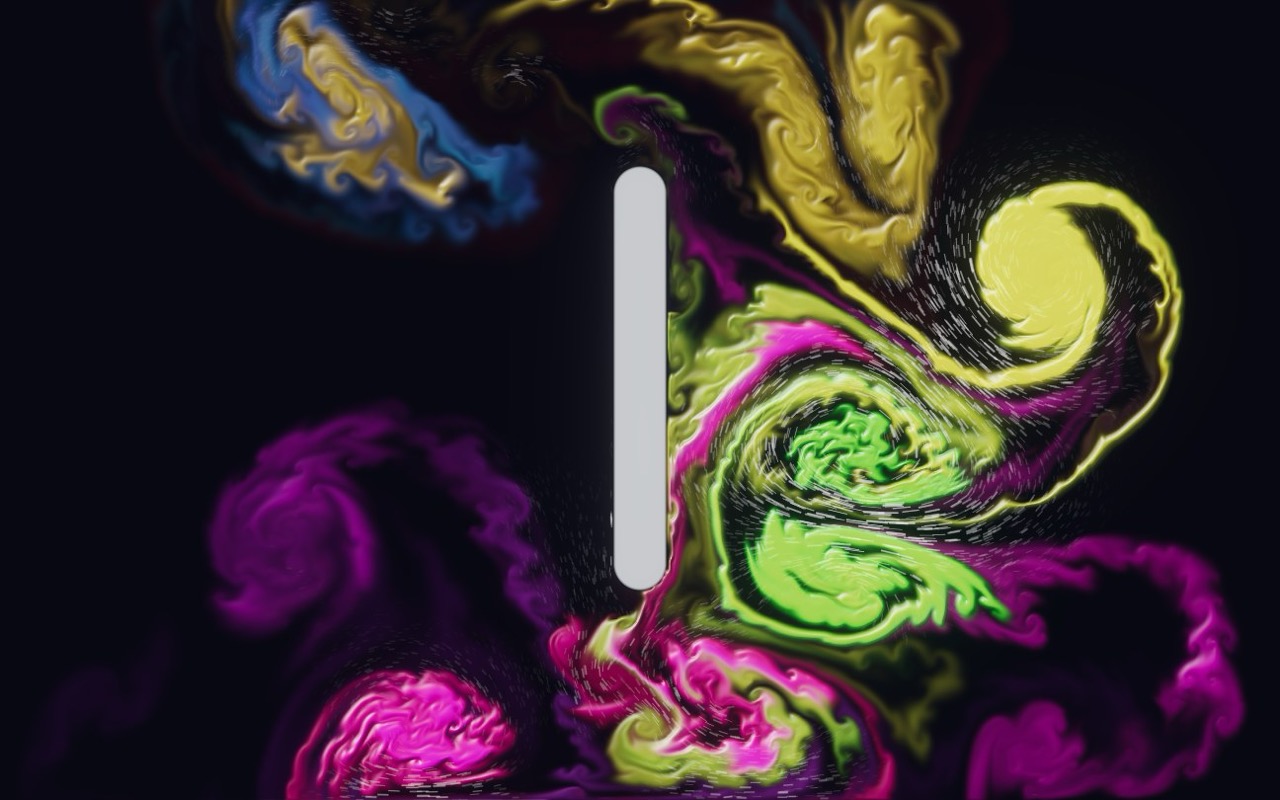
- Choose Create ▸ 2D ▸ Shape 2D ▸ Box (or Circle or Capsule).
- Drag it onto Fluid Tank in the Hierarchy, so it is the tank's child, and move it onto the water. Set its size on its Shape2D component.
- In its MeshRenderer, open renderLayers and tick Obstacles (layer 1). Keep Default ticked to see it as well; untick it for an invisible wall.
A wall must be a Shape 2D: the Obstacles camera's Shape Distance material reads the shape's size from the mesh the Shape2D component builds. Walls can move while the water runs; the Obstacles camera redraws them every step.
Add a pusher or a colour source
The brushes work on their own. A quad that stays on the Forces layer with the Push Capsule material is a fan; one on the Dye layer with Dye Capsule pours colour in.
- Create a quad as a child of Fluid Tank, with a MeshMaterial of Push Capsule (or Dye Capsule).
- Tick only Forces (or Dye) in its renderLayers.
- Set its overrides: Length and Radius (in tank units) and Speed (Push) or Rate with Rainbow 1 (Dye; set Rainbow to 0 to use Color instead).
- Scale it to (Length + 6 x Radius) by (6 x Radius). The capsule fills that rectangle; a smaller quad cuts it off.
Push Capsule pushes along the quad's local x axis, so rotate the quad to aim it.
Add a source or a drain
The package has no material for the Sources layer. Any unlit material whose colour is (x, y, 0) works on a quad on the Sources layer: x above 0 pours water in, below 0 drains it, and y slows the water there (its velocity is multiplied by exp(-y) every step).
Limits
- Flat and upright. The tank is 2D: move it and scale it uniformly, but do not rotate it. The Stirrer and the sparks assume an unrotated tank.
- 60 steps a second. The graphs have 1/60 s built into their constants (the look-back distance, the vorticity, the brush weights). A different Fixed rate in Project Settings ▸ Time changes how fast the water moves.
- One tank per scene. The render textures and the Water simulation are project assets, so two tanks share them. Use one tank per scene.
- Brush wall test at the origin. Push Capsule and Dye Capsule look up walls as if the tank sat at (0, 0) at scale 1. In a moved or scaled tank they can push and paint through walls you add.
- Four layers. Render layers 1 to 4 belong to the fluid in a project that uses it; anything else on them acts on the water.
See also
- Simulations - update graphs, the Simulation asset and component
- Render Textures - cameras drawing into textures, and render layers
- Simulation Panel - steps, GPU times and live textures
- Shader Graph - opening and editing the step graphs
- 2D - Shape 2D, the shape the walls are made of
- Asset Store - getting the package